Friday, July 11, 2014
Snickerdoodles
When making these cookies, plan ahead. You will have to refrigerate the dough. They will still be okay if you skip that step, but they won't be nearly as good.
Don't preheat your oven yet! Usually that's the first instruction but not today.
1/2 cup or 137 grams butter
1 cup or 200 grams sugar
1/4 teaspoon bicarbonate of soda
1/4 teaspoon cream of tartar - (for classic snickerdoodles this must be included)
1 egg
1/2 teaspoon vanilla
1 1/2 cups or 250 grams plain flour
---------------
for rolling cookies later
quarter cup granulated sugar
1 heaping teaspoon cinnamon powder
In a mixing bowl beat the butter until soft. Add in 1 cup of sugar, bicarbonate of soda, and cream of tartar. Beat until well combined. Add egg and vanilla and beat until combined. Beat in the flour. If you are using a blender, go as far as you can with the blender, scraping the sides of the bowl and then finish off with a big spoon.
Cover and chill the dough for at least an hour!
In a shallow bowl mix the remaining granulated sugar and cinnamon powder.
NOW preheat the oven to 375 F or 200 C
Pinch or spoon out the dough and roll it into 1 inch balls. Roll the dough balls in the cinnamon sugar and then arrange on ungreased baking trays.
Bake the cookies for 10 to 15 minutes OR until the cookies start to turn golden at the edges.
Transfer the cookies immediately to a wire cooling rack. If you let them cool on the baking trays, they will be STUCK there. You have to move them.
Enjoy them!
Friday, March 26, 2010
Naan Bread - A MUCH Better Recipe
I have a new recipe for naan that will make (in my opinion) naans that are as good as the naan bread on offer in the local curry house. You can make them fairly easily without the trouble and expense of getting a tandoor installed.
This recipe makes about six naan bread.
You will need:
1 sachet active dry yeast
1 cup warm water
1/4 cup white sugar3 tablespoons milk
1 beaten egg
2 teaspoons salt
4 1/2 cups flour
melted butter for brushing on the just cooked naan (very optional)
A flat skillet or griddle with a handle.
Dissolve the yeast in the cup of warm water in a measuring jug, add the 1/4 cup of sugar and stir. Let this sit until the yeast starts to go all frothy. Add in the milk, beaten egg and salt.
Put two cups of the flour in a large mixing bowl and add in the measuring jug of wet ingredients. Stir it until it is a smooth goo. Stir in the remaining flour until you have a nice dough. Scrape the dough out onto a clean floured surface and knead it until it is smooth. Place the dough in an oiled bowl, cover with cling film or a clean kitchen towel and leave to rise. Depending on the temperature of the kitchen this can take as little as an hour or much longer. If you are making this dough ahead of time, cover in cling film so that the dough doesn't start to develop a dry skin. In the winter my kitchen is cold. I turn on the oven before I start making the dough and turn it off after kneading. I then open the oven and place the bowl with dough in the warm but-not-hot-enough-to-cook oven.
After the dough is risen and you are ready to cook the naan, divide the dough into what I can only describe as small handfuls of dough and on a surface that has been dusted with flour roll the dough portions into a smooth ball and roll them out until they are just about 1/4 of an inch thick. I never actually measured the thickness of the dough 1/4 inch is a guess. You don't want it as thin as a pie crust. Think American pancake or British drop scone thickness.
Heat a skillet or griddle and your oven's grill or broiler up and one by one place the rolled out dough on a skillet. Leave it to cook until you see small bubbles forming on the surface. Then WITHOUT TURNING the dough over, stick the whole thing, skillet and all under the grill/broiler. Naturally you have common sense and will leave the handle of the skillet or griddle sticking out and away from the grill/broiler element so that you can remove it when the naan is finished.
Tip the naan off onto a dish and put the skillet/griddle back on the flame to to do the next one. Brush with melted butter at this point if you want. Do this one by one until all the dough has been cooked into naan bread.
I make these just before I serve a curry so that they're still warm when we sit down to eat.
Tuesday, March 16, 2010
Brioche!!
The butter isn't mixed in until the dough has already been made. It will be a major pain in the neck, you'll have to have a good sized working space that is scrupulously clean, but this method results in fabulous brioche that you would not be ashamed to present to the snobbiest of food snobs. I have a lightweight electric beater and I know the old motor would go so I do this by hand. You can always TRY using that expensive mixer that you have gathering stylish dust in the corner or your kitchen. I don't have one so you'll have to let me know if it works.
This recipe makes two loaves
400 grams white flour
50 ml milk1 packet of dry yeast
4 large egg PLUS three yolks50 grams sugar
1 teaspoon salt
250 grams unsalted butter
The night (or even day) before you need to bake the dough:Pour milk into a glass measuring jug and heat it in the microwave until it is boiling. Remove milk from microwave and set aside to cool for a few minutes (you may need to top it up with more milk so that you have exactly 50 ml). When it is no longer scalding hot, stir the yeast into the milk.
Measure out 400 grams of flour. Steal two tablespoons of flour from the bowl and add it into the milk and yeast mixture and stir until it is a smooth paste. Cover the measuring jug with a small plate and let it prove for 30 minutes.
Cut the 250 gram block of butter into cubes. I separated the cubes onto a dinner plate so that they'd soften better. As it is still cold in the kitchen I will confess to popping the plate with the butter cubes into the microwave for 10 seconds. This softened but not melted the butter. I could pick up the butter cubes very gently.
Once that has started to get active, beat the eggs, yolks, sugar and salt together in a mixing bowl, and add in the yeast milk paste. I used my electric hand mixer for this to get it blended nicely. Add in the rest of the flour and stir it until a rough dough has formed. Then cover the bowl and leave it alone for another 30 minutes. That's right, don't knead it. It's too sticky anyway.
Before you start the next step is recommended that you fill the sink or washing up bowl with warm soapy water. You'll be so glad you did this in a few minutes.
Now for the messy part. Have a scraper or rubber spatula handy. Scrape the sticky dough out onto your clean (NO flour) work surface. You are now going to blend the butter into the dough. Start working the butter piece by piece into the dough with your hands. Stretch it out and flop the dough back on itself adding in a cube of butter from time to time. You'll have to use the scraper to keep all the dough in the one area unless you're a very tidy person. Stretching the dough back and forth until all the butter has been mashed into the dough. When there are no more lumps, scrape the dough back into a bowl and go wash your hands. Now cover the bowl with cling film and place it in the refrigerator. The dough can be refrigerated for up to two days before baking.
Baking:
Butter two loaf tins. Divide the dough into two and shape each half into a cylinder. OR if you prefer, roll it into a ball and put the ball on a buttered baking tray. It's your call. I did one ball and one loaf. I floured the work surface VERY lightly to get the dough into the shapes I wanted. Once in the tin (or baking tray) cover with a clean cloth and set somewhere to rise for a couple of hours or until doubled in height. Heat the oven to 220 C - brush the top with beaten egg and bake for 15 minutes. I garnished mine with sugar crystals. Reduce the heat to 180 C and continue baking for 20 more minutes or until your loaves have the wonderful golden brown of a real brioche.
Remove from the tin or baking tray and place on a cooling rack. How long will you wait until you slice into it? I could only wait 10 minutes.
Saturday, January 16, 2010
Cinnamon Rolls
4 to 4 1/2 cups plain (all-purpose) flour
1 packet of dried yeast
1 cup milk
1/3 cup sugar
1/3 cup butter
1/2 teaspoon salt
2 eggs
- - -
3 tablespoons of melted butter
1/2 cup sugar
2 teaspoons ground cinnamon
-----
optional loveliness
1/2 cup raisins
1/2 cup chopped pecans
1. In your large mixing bowl combine 2 cups of the flour and the packet of yeast; set aside. In a small saucepan warm the milk, along with the 1/3 cup sugar and the 1/3 cup butter until the butter is almost melted. -(It is not a crime if the butter melts completely) Add this warmed milk mixture along with the eggs to the flour mixture and beat with an electric mixer until it is smooth. Stir in as much of the remaining flour as you can.
2. Turn the dough out onto a clean and floured work surface and knead the dough until it is smooth and elastic. Shape the dough into a ball, and put it in a lightly buttered bowl. Turn the dough once or twice to ensure that the dough is lightly buttered as well. Cover and let it rise in a warm spot until it has doubled in size.
Preheat your oven to 375 F or about 220 C.
3. Punch the dough down (when my boys were little somebody always begged to be the one to punch the dough) and turn the dough back out onto your lightly floured kitchen surface. Let it rest a few minutes. While it is resting, grease a baking pan.
4. Roll the dough out into a nice big rectangle on your kitchen work surface. Brush the melted butter onto it and then sprinkle the cinnamon and sugar over the buttered dough. I must confess that at this point, I have never measured the amount of sugar and cinnamon that I sprinkle on. I keep a jar of cinnamon sugar in the kitchen for cinnamon toast and I just sprinkle this on until I think there is plenty on there. Sprinkle raisins and chopped nuts on with the cinnamon and sugar if you want them.
5. Beginning at the long side of your dough, start to roll the dough. In the end you will have a large log of dough with swirls of cinnamon and sugar inside. Don't try to pick the log up or handle it too much. It will start to unroll and just make a mess. Slice the log into 12 equal pieces and place the slices onto your greased baking pan.
Bake in the oven for about 25 minutes or until the top of the rolls are golden in colour.
You can make some icing by putting in a cup of powdered or icing sugar in a bowl with just enough water to make it spreadable (you just need a few teaspoons). Drizzle this over the still warm rolls and enjoy them!
Tuesday, May 20, 2008
Dobos Torte
As with all things, I have to try to recreate things in my own kitchen. For a first attempt, I don't think I did all that badly. Naturally the commercial version in the top photo is much prettier than mine but I like to think that my version is much more generous.
Please read the whole recipe through before starting. It isn't a particularly difficult recipe, but it does take a long time. The other thing about this recipe is that it calls for LOTS of sugar and butter. Don't try to "cut back" on any sugar or substitute low fat spread for butter. This is not a cake for dieters. If you're watching your weight or if your making it for somebody who is a calorie counter, make something else. Trying to convert Dobos torte to something healthier is going to waste your time and deny you the true pleasure of this wonderful desert.
INGREDIENTS
- 9 egg whites
- 8 egg yolks
- 200 g white sugar
- 60 ml milk
- 6 g lemon zest
- 1 g salt
- 8 ml vanilla extract
- 190 g sifted all-purpose flour
- 60 g shortening
- 200 g white sugar
- 1 recipe chocolate buttercream
- Beat the egg whites until frothy, and gradually add 1 cup sugar. Beat just to soft peaks. In another bowl, beat the yolks with the milk, lemon peel, vanilla, and salt. Fold this into the egg whites. Sift the flour over the egg mixture, and fold in.
- Spread 1 1/3 cups batter into the prepared pan. Bake for about 5 to 9 minutes, or until small, brown spots begin to appear on cake. Remove the cake from the oven, and remove layer from pan with a spatula. Dust the cake lightly with flour, and place on a rack to cool. Grease pan again, and repeat this process until all of the batter is used, about 5 times more. Place the layers between wax paper, and cover with a towel. Chill layers for a few hours. Make the Chocolate Buttercream.
- Layer the chilled layers on one of the cardboard rounds with the buttercream. Start with one layer; cover with the buttercream, and then press down with another layer to make a good seal. Repeat this with the remaining layers, but reserve one layer. Wrap the cake in plastic, and chill for at least 6 hours along with the remaining buttercream. Grease the other cardboard round with the shortening, and place the last layer on it.
- Place 1 cup sugar into a non-stick skillet over medium heat. Allow sugar to cook until the edges look melted and brown. Begin stirring with a wooden spoon. Cook until the sugar become an amber color, and is smooth. Carefully pour the caramel over the top of the last layer, and spread to the edges with an oiled knife. Quickly, using an oiled knife, indent the top of the caramel into 16 wedges. Allow to cool slightly, and then retouch the indents with the knife again. Place layer onto a counter top dusted with sugar, and allow the caramel to cool completely.
- Place some more buttercream on top of the chilled torte, and top with the caramel round. Frost the sides with the remaining buttercream. Chill the torte before serving.
Chocolate Buttercream
INGREDIENTS
- 336 g bittersweet chocolate
- 455 g unsalted butter
- 1 g salt
- 2 eggs
- 480 g confectioners' sugar
- 5 ml vanilla extract
- Melt the bittersweet chocolate, and allow to cool slightly.
- Place the butter or margarine, salt, and vanilla in a mixing bowl. Beat with a mixer until very light and airy, about 4 minutes.
- Add the powdered sugar a little at a time while beating on low speed. Mix well, and beat on medium speed for about 4 minutes.
- Add the eggs one at a time, and beat for 5 minutes more.
- Add the melted chocolate, and beat 4 minutes.
You just have to ensure that it is all blended and fluffy at the end.
The recipe is hard on your electric hand mixer and the kitchen will look as though a bomb hit it (a powdered sugar bomb) but the effort is worth it!
My Notes: I am sure it would be easier if I had lots of baking tins and could bake more than one layer at a time. As the layers you are baking are thin, please keep a sharp eye on them. They bake quickly.
The chocolate buttercream does not handle well when refrigerated. I got all the layers built and the sides iced before I even thought about refrigerating.
If the molten sugar goes over the edge of the top layer, don't panic. You will be able to snap off the overspill and nobody will be any wiser.
Saturday, February 02, 2008
Root Beer
One can try boiling down sassafras root and making your own flavoring for root beer but sassafras isn't the only thing that goes into root beer. Wintergreen and possibly dandelion root go in there too. You really have to be a pharmacist to the right mix. In any case, I left the mixing to the experts and used some root beer extract.
Sadly, Hires Root Beer extract form is no longer available. I remember Hires root beer extract being in the cupboard when I was a child. Every once and a while, I'd unscrew the cap a little tiny bit so I could get a sniff. Thanks to my dad's generosity, I used Gnome brand root beer extract. He brought some over during one of his visits. It is as close to good old fashioned root beer taste as I can ever hope to achieve.
Making root beer requires some essential equipment most of which can be picked up at a shop that specializes in home brewing or on-line.
Big 5 gallon bucket
a funnel
enough plastic bottles with screw caps OR
glass bottles and a bottle capper to bottle it all when you're finished
--------------------------
8 cups of white sugar (more or less to taste)
brewers or champagne yeast
root beer extract
4.5 gallons of water
When making root beer everything must be scrupulously clean. I didn't sterilize anything but I did wash everything that came into contact with the root beer in very hot soapy water, rinsing with hot hot water. Some instructions for making root beer say to sterilize the bottles. That's probably a good idea. I re-used some plastic bottles that wouldn't take the heat of sterilization so I just got them as clean as I could and I added a cap full of bleach to the wash water.
Pour one sachet of the yeast into a measuring jug and add in warm (not hot) water. Stir the yeast and water to dissolve the yeast completely and let it stand for 15 - 20 minutes or so.
In your big bucket, dump all the sugar in and add some warm water. I ensured that all the sugar is dissolved before I had the root beer extract. Add in the root beer extract and stir. Add in the yeast and top up the water level until it reaches 4.5 gallons (just don't go over the 5 gallon mark).
Now start bottling the stuff. When filling bottles (glass or plastic) make sure you leave a bit of head space at the top. Don't fill the bottles to the brim.
Wipe off the bottles and set them somewhere out of the way to cure.
In about 3 days, check the carbonation levels by opening up a bottle. Do this in the sink in case you get a gusher. When the carbonation levels are about right, refrigerate the bottles to stop the yeast.
You now have a lot of root beer to drink. I'm planning to make a batch in the summer for a root beer float picnic party.
There are lots of other root beer recipes on line. I've just given you mine.
Thursday, December 06, 2007
German Chocolate Cake - with Coconut Pecan Icing
Should you choose to fire up the oven in your own home, I highly recommend trying this recipe sometime. It's wonderful.
Preheat your oven to 350 F or 180 C
1 1/2 cups plain flour
3/4 teaspoon bicarbonate of soda (baking soda)
1/4 teaspoon salt
4 ounces of sweet baking chocolate (use good chocolate if you have it)
3/4 cups shortening (vegetable fat)
1 cup sugar
3 eggs
1 teaspoon vanilla
3/4 buttermilk or sour milk
Grease and flour your baking tins and set aside. I use two 8 x 1 1/2 inch round cake tins.
In a small saucepan melt the chocolate with 1/2 cup water over LOW heat until the chocolate is completely melted and you've got a lovely smooth chocolate sauce. Then set it aside to cool.
In a mixing bowl beat the shortening with an electric mixer until fluffy and then add the sugar and beat some more. Add the eggs and vanilla and beat this until completely smooth and combined. Stir in the chocolate mixture and finally add the buttermilk or sour milk.
Now sift the dry ingredients into the bowl and mix completely until it is smooth and free of lumps.
Divide the batter into your cake tins and place in the centre of your oven to bake for about 35 minutes.
When the cakes are done baking, remove them from the oven and turn the cakes out onto a wire cooling rack. You can frost them with any icing but nothing beats the coconut pecan icing below.
-------------------------------------
Coconut Pecan Icing
In a heavy medium sized sauce pan lightly beat one egg with 5 oz of evaporated milk. Stir in 2/3 cup of sugar and 1/4 cup butter. Stirring over a moderate heat, cook the mixture about 12 minutes until it is thick and bubbly. Remove from the heat and stir in 1 1/3 cups dessicated or flaked coconut and 1/2 cup chopped pecans until they are all mixed completely. Cover the pan and cool thoroughly. When it is cool, use this to ice the cake.
Tuesday, September 25, 2007
Glazed Doughnuts
Monday, August 20, 2007
Orange Delights
Orange Delights
¾ cup butter or margarine
1 ½ cups brown sugar
2 eggs
1 teaspoon vanilla extract
grated rind of 1 large orange
½ teaspoon baking soda / bicarbonate of soda
½ cup sour milk or buttermilk
3 cups of plain flour
1 ½ teaspoon baking powder
Icing
2 cups of sifted icing sugar
2 tablespoons of orange juice and a bit of grated orange rind
Cream butter and sugar together, add eggs and beat. Add sour milk, orange rind, vanilla and flour. Drop by spoonfuls onto a baking tray. Bake at 375 F or 180 C until the cookies are golden brown.
In a separate bowl, mix the icing sugar and orange juice and rind. Adjust by adding more sugar or more orange juice so that the glaze gets to a nice spreading consistency.
If you ice the cookies when they are still warm, the icing will melt into a nice glaze.
Store the cookies in an airtight container, ensuring that the layers are separated by baking parchment or waxed paper because the icing will stick to everything.
Monday, January 01, 2007
Waffles!
Too much batter!
Friday, November 17, 2006
Note To Searchers/Readers!
Are you one of the people who has come here looking for an answer to a question about recipes? e.g. Why my apple crumble is always runny
Were any of my recipes what you were searching for?
If you have a question, just ask it in the comments section or e-mail me. I'll always answer questions.
The recipes that I have put up here are ones that are firm family favourites and I make them all the time. I hope they they become your favourites too.
Monday, November 13, 2006
Banana Bread
I usually make this when a couple of bananas get too ripe to eat. Those bananas have the strongest banana flavour and I don't have to throw them out. I can't seem to bring myself to throw out a banana. I can throw out rotten apples and oranges, but bananas . . . . they must be put into banana bread.
Pre-heat your oven to 350 F or 180 C
Grease and flour a loaf tin (approximately 8 x4 x2)
1 1/2 cups plain or all purpose flour
1 1/2 teaspoons baking powder
1/4 teaspoon baking soda or bicarbonate of soda
1/4 teaspoon cinnamon
pinch of salt
1 egg
1 cup mashed banana (about 3 medium sized bananas)]
1/2 cup sugar
1/4 cup cooking oil
1/2 cup chopped nuts (optional) I love to add chopped pecans as they're my favourite nut
Mix the flour, baking powder, baking soda, salt and cinnamon in a medium bowl. Form a well in the centre of the dry ingredients.
In a separate bowl mix the remainder of the ingredients together. Add the wet ingredients to the dry ingredients all at once.
Mix the batter together and then fold in the nuts. It is perfectly okay for the batter to be lumpy. Pour or spoon all the batter into your prepared loaf tin and pop it into the pre-heated oven. Bake for about 50 - 55 minutes or until an inserted toothpick comes out clean.
Sometimes the banana bread will have a huge crack on the top, I keep an eye on this crack and can tell when the banana bread is done by looking at the crack.
With such a dense batter and the shape of a loaf tin, it is very easy to under cook banana bread. Its better to have it a bit overdone on the surface than to have some uncooked batter in the middle. It makes for an unpleasant slicing experience. If your oven runs a bit hot, turn it down and cook this a bit more slowly.
Sunday, November 12, 2006
Pumpkin Bars

Here in the UK, canned or tinned pumpkin is not readily available so we have make our own pumpkin puree.
Pumpkin to be used next to an orange so you can see how big the pumpkins should be.
Mmm - baked pumpkin!You can use a larger pumpkin, but I find that aside from being good for carving, they're not that hot for culinary uses. They're too watery. If you do use a larger pumpkin, you simply will have to drain the water from the baking tray from time to time as you are baking.
Scrape the flesh of the pumpkin into a food processor and discard the shell. Whizz the pumpkin flesh in the food processor until it is all smooth and lump free.
Now on to the rest of the recipe.
In a large bowl put in:
2 cups of plain or all purpose flour
1 cup of white sugar
2 teaspoons of baking powder
2 teaspoons of ground cinnamon
1 teaspoon baking soda (bicarbonate of soda)
1/4 teaspoon salt
1/4 teaspoon ground cloves
Mix the dry ingredients. Then make a well in the centre of the dry mixture and add in:
4 beaten eggs
1 16-ounce can of pumpkin OR
the pumpkin puree you've just made * I weighed my last batch of pumpkin puree and it came to 4oo grams or 13 British ounces *
1 cup cooking oil (use corn oil - olive oil makes it taste odd)
Beat this until it is smooth and lump free. I use my trusty electric beater for this. Beating it by hand takes ages.
At this point, I usually carry the bowl of orange pumpkin bar batter around the house for everybody to have a sniff because it smells so great!
Pour the batter into an ungreased 15 x 10 x 1 inch baking pan and pop it into your oven (350 F or 180 C).
Bake for about 30 minutes. Remove when the top has become slightly browned. I usually pull it out when I think it is done and give it a light touch on the top. If it feels firm, then it is done. If it is still a little mushy underneath, pop it right back in for another 10 minutes.
Look! This is done to perfection! Shame you can't smell it!When the bars are finished, pull the tray out and let it cool for about 2 hours.
Then you can frost it with Cream Cheese icing!
------------------------
Cream Cheese Icing
Blend together in a bowl:
6 ounces of cream cheese
1/2 cup of softened butter or margarine
2 teaspoons vanilla extract
Sift in:
2 cups of powdered or confectioners sugar
Gradually beat in additional powdered sugar (another 1 or 2 cups) until it reaches a spreading consistency.
Spread the icing on the uncut pumpkin bars and then slice them up. They'll lift out of the pan like a dream.
---------------------------
Applesauce Bars or Applebutter Bars
Use the above recipe but substitute a 16 oz jar of applesauce for the pumpkin and don't frost them as they'll be sweet enough.
You can also try making it with a jar of Apple butter and omitting the spices in the dry mix (see recipe below)! Those are fantastic!!
Tuesday, September 26, 2006
Apple Butter
Thursday, August 31, 2006
Bramble Crumble (also Apple Crumble)

Preheat your oven to 350 F or about 200 C
If you are making Apple Crumble on its own, I often add cinnamon and a bit of porridge oats into the crumble mixture and a dash of cinnamon into the fruit too.
You know the size of your own casserole dish and you'll know when you've layered enough fruit into the bottom of it.
Sprinkle the crumble topping on the top of the fruit and pop it in the oven.
Bake it until the top is toasty brown and the fruit juices are bubbling up in a couple of places.
Remove it from the oven and LET IT COOL for a little while before serving. If you serve this straight from the oven, you'll burn yourself and possibly anybody else who eats it at this temperature.
It is wonderful served with custard or cream or ice cream.
George doesn't like his crumble "messed with" - he eats it on its own.
Tuesday, August 15, 2006
Naan Bread
Because we live in the deep dark Scottish countryside, fresh naan bread is not available unless we visit a restaurant. I decided to try my hand at making them one year. Pleased with the results, I ended up making them for years.This recipe from Madhur Jaffrery's Eastern Vegetarian Cooking. The recipe is modified for domestic ovens so that you don't feel the need to buy a clay tandoor. The recipe calls for a great deal of plain yoghurt. Conveniently, I have a coal fired range in my house. It was discovered that if the door to the oven portion of this range was left open, the temperature inside was perfect for the making of yoghurt. This means that I only ever have to buy a small amount of yoghurt as starter and make the pint of yoghurt needed here at home.
A different recipe that doesn't require any yoghurt can be found HERE.
1lb/450g plain white flour
1tsp baking powder
1/4 tsp salt
about 15 fl oz plain yoghurt
unsalted butter (optional)
Sift the flour, baking powder and salt into a bowl. Slowly add as much yoghurt as you need to gather the flour together and make a soft dough. Knead for 10 minutes and form a ball. Put the ball in a bowl and cover the bowl with a damp cloth. Set this aside in a warm place for 1 1/2 to 2 hours. Knead the dough again and divide into nine equal parts. Keep these covered util you are ready to bake them.
Heat a cast iron frying pan or griddle over a lowish flame.
Pre-heat the grill
Take one of the parts of dough and make a ball out of it. Flatten it and then roll it out on a lightly floured surface until it is about 1/4 inch thick.
When the frying pan or griddle is hot, slap the naan onto the frying pan. Let it cook for a few minutes. It will puff up a bit, sometimes it will puff up completely. Now place the whole frying pan or griddle under the grill to cook the top half of the naan. This was always the part that my children loved and where the bread got the nick name "puff-a-puff" bread. The bread will puff as it cooks. You will know it is finished because reddish spots will have appeared on the surface of your naan. Remove the naan with a spatula and brush with butter if you like. Make all your naans this way, keeping them stacked and covered with a clean cloth.
Bacon Lettuce and Tomato Sandwich (on white toast)
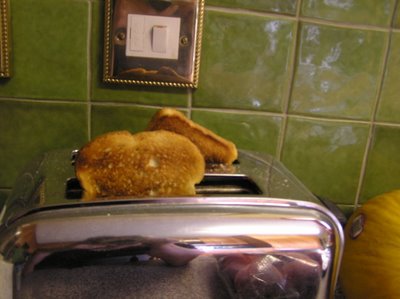
Start with white toast. I make the toast first and let it cool. If the toast is warm, the mayonnaise will melt. I don't want my mayonnaise melted too much.
After the bread has been put in the toaster, I get that bacon frying.
Mmmm bacon! (said in a Homer Simpson style)
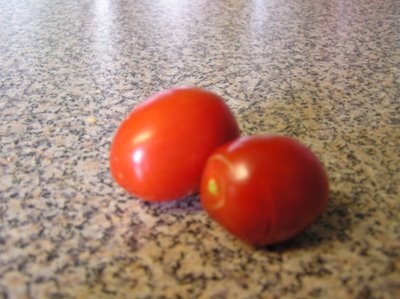
Slice those tomatoes. I am using tomatoes that have been plucked straight from the vine in my own greenhouse. Home grown tomatoes are the best! I seem to only make this sandwich when the tomatoes have ripened in the garden. The pink tennis balls on offer in supermarkets in the winter have no appeal. I'll wait until late summer thank you very much.Now you may think this is strange but I really don't like tomatoes very much. I will never eat one raw. I won't eat the cherry tomatoes and tomato wedges that haunt salads. I think it's a texture thing. However, sliced thinly in sandwiches, they're okay and in the case of this particular sandwich, essential.
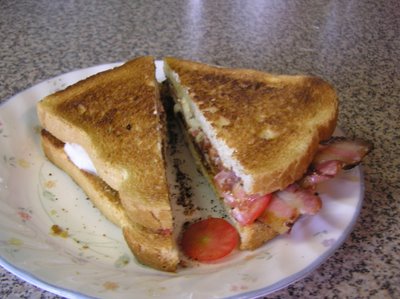
Spread mayonnaise on the toast and add the tomato slices, lettuce and crispy bacon strips. Put the top on the sandwich and cut it.
Man! You just can't beat that sandwich!

(You may notice the lack of lettuce in these photographs. It's raining outside and I don't want to go into the garden to get the lettuce because I'll get wet.)
Saturday, May 06, 2006
Chocolate and Raspberry Pavlova
I will only make it when the raspberries are in season. I got some raspberries this week that seem to be okay even though it is still a bit early. They're from Spain and have a pretty good perfume. Out of season, they’re too sour.
For the chocolate base:
6 egg whites - my own Whitelees eggs are so huge that I only used 5 this morning and it worked out just fine.
300g (1 1/3 cups) sugar
3 heaping tablespoons cocoa powder, sifted
1 teaspoon balsamic or red wine vinegar
50 g of dark chocolate, finely chopped (50 g of plain chocolate chips will do if you're stuck)
For the topping:
500 ml (about a cup) whipping cream or double cream
500 grams raspberries
coarsely grated dark chocolate
Preheat your oven to 180 C or about 350 F and line a baking sheet with baking parchment or baking paper . Beat the egg whites until peaks form and then beat in the sugar a tablespoon at a time. (it will take a while – patience please) Beat until it is all soft and shiny. Sprinkle the cocoa powder and vinegar over the top and the chopped chocolate. Gently fold everything thoroughly . You don’t want to loose all the air you just spent ages getting IN.
Mound all of this onto the baking paper in a circle that is a rough 8 inches in diameter and pop it in the oven. Immediately as you put it in the oven, turn the temperature right down to just under 150 C or about 280 F and bake for one to one and a half hours. When it is finished, turn off the oven, but leave the meringue in the oven and let it cool as the oven cools. When it is ready it should be crisp around the edges and on the sides and dry on the top.

This is the finished base. It is taking all my self-control not to break it up into bits and eat it now. I could do that, but I don't have enough eggs to make another at this point. I have some eggs, but they were laid this morning and won't be ready to use for baking until tomorrow. Did you know that you can't use a really fresh egg for most baking. The eggs have to be at least a day old.
Now whip the cream (add a little vanilla extract and a smidge of sugar if you think your raspberries might be too sour.)
When you’re ready, invert the base onto a serving dish and put the whipped cream on the base. Arrange the raspberries on top of the whipped cream and garnish with the coarsely grated chocolate. You're ready to go.
BLUEBERRY MUFFINS - or Cranberry
Preheat your oven to 180 C or 350 F. Put muffin papers in your muffin tin OR if you are out of muffin papers grease and flour the tin.1 3/4 cups plain flour
1/3 cup sugar
2 teaspoons baking powder
1/4 teaspoon salt
1 beaten egg
3/4 cup milk
1/4 cup cooking oil
Mix all the dry ingredients together and make a little well in the centre. Into the centre pour the beaten egg, milk and oil. Only mix it a little bit. The lumpier the batter, the better the muffins will be.
It's so important I'm stating this twice. DON'T OVER MIX. The lumpier the batter, the better the muffins. I barely blend the mixture.
Now fold in the blueberries. Spoon the batter into the muffin papers and pop into the oven for about 25 minutes or until the tops are golden brown. This recipe will make 7 nice big muffins or 9 small ones. I prefer big. If you prefer the smaller muffins, cut the baking time. The photo above shows the approximate size if you only make seven.
Cranberry version
If you wish to make cranberry muffins, and a bit more sugar to the batter and replace the blueberries with a cup of cut up cranberries. I cut them in half. Cranberries are really tasty but very sour. I sprinkle a bit of granulated sugar on the tops of the muffins before baking. Makes for a crisp bit of sugar to balance out the pucker value of the cranberries. Cooked cranberries are as beautiful as rubies.
NOTE: Thanks for the comment about be not putting in the amounts of blueberries or cranberries in the above recipe. I didn't put the amounts in as I usually just use a whole container of blueberries straight from the shops. The containers aren't large in the UK and seem to have just enough for one batch of muffins. If you want actual measurements, then about a heaping cup of blueberries. Naturally, add more if you've got them or fewer if you want less blueberry goodness in the muffins. As for cranberries, a good cup of cranberry halves will do. Adjust the amounts to your own personal taste.. in other words - "some" blueberries and "some" cranberries.
Monday, May 01, 2006
Caramels
Before you start, get your pan ready. Line an 8 x 8 x 2 inch pan with a big sheet of cooking foil. Then butter the foil. You'll be glad you did this before hand because if you don't do this first, you'll have to stop stirring the candy at a crucial point and it may burn. If you want chopped walnuts or even better, pecans in the final product, sprinkle them onto the buttered, foil-lined tin.
This is not a recipe that you can do while having a glass of wine. You will be dealing with food temperatures that are a lot hotter than you would find normally. Save yourself unnecessary pain and another cooking burn by staying clear headed.
1 cup butter - please use butter and not margarine - no substitutions for this one
16 oz of light brown or muscavado sugar (about 2 1/4 packed cups)
2 cups of cream (US folks please use half and half)
1 cup light corn syrup (Karo syrup - not available in the UK)
1 teaspoon vanilla extract (which I forgot last time and it still turned out beautifully)
In your heaviest bottomed large pan melt the butter over low heat. Add in the brown sugar, cream and corn syrup. Stir in and turn the heat up a tiny bit. Clip a candy thermometer onto the side of the pan. When the mixture starts to boil, check the flame under your pan (if you're using gas - make sure that the flame is only just touching the bottom of the pan) I cannot stress enough that you can't turn up the heat to make this recipe cook any faster. Slow and steady.

Stir the boiling mass constantly while monitoring the thermometer. Keep going until the candy has reached the firm ball stage. The thermometer will register about 248 F or 120 C. You will have noticed that the texture of the mixture will have started to change. Please be careful at this point. Right at the end when the candy is at its hottest is when you run the greatest risk of burning your candy.
When it is ready, remove from the heat, stir in the vanilla and pour the caramel into the prepared baking tin. You're going to have to let it cool for hours. When it is first poured out, it is molten sugar and will give you a nasty burn. Don't touch it!
When it has cooled completely, unmould it onto a big cutting board and using your biggest knife, cut it into small cubes. Put all the cubes in an airtight container and hope that they last in your house for more than a day.

See - its empty